Integrating with the DataVault
The DataVault is different from our other simulators. Instead of allowing you to test different responses the DataVault acts as in production. This means that the requests/responses will mimic the production environment
Note that validations will still work the same as for all other simulators but coverage will display as "N/A" within TestingPays
Below we will cover the important points of the DataVault, what it's for, how it works and how to use it both in production and against our simulators.
What is the DataVault?
In some cases you may want to save your users card details but you don't want to store sensitive data about the card itself (such as CVV). Using the DataVault allows you to save the details within Authipays system under a token name (HostedDataId) that you submit. This token can then be submitted instead of card details when making a transaction.
Our DataVault mimics this behaviour by storing card details you send in through the Sale, PreAuth and ForceTicket simulators as long as a HostedDataId is provided. You can then use that HostedDataId to display, update or delete the users card details through the DataVault simulator.
Note if you provide a
HostedDataIdthat already exists then the details of that card will be updated.
Now that you understand the basics of how the datavault works and why it exists we can dive into integrating with the simulator.
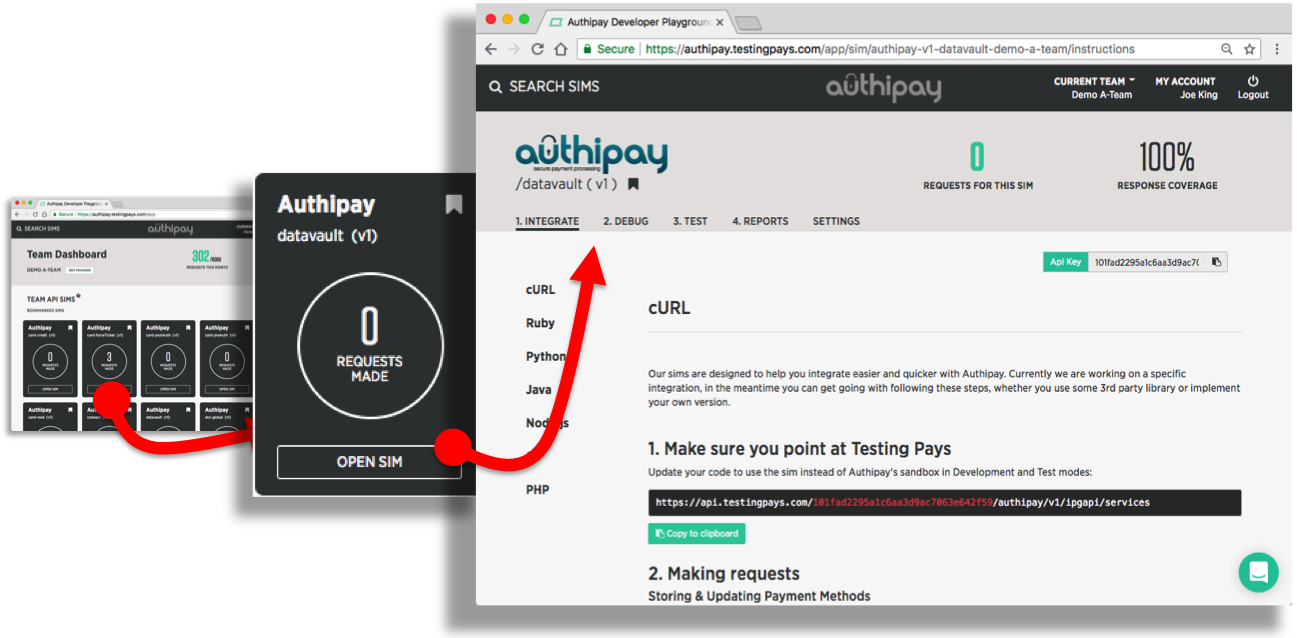
Step 1: Open the DataVault simulator
For the purposes of making test DataVault transaction, you'll be using the DataVault simulator in the Authipay Developer Playground.
To open the simulator interface, login to your Authipay Developer Playground account and click "OPEN" on the "card-sale" bookmark on your dashboard. You'll see the following sections in your simulator:
- Integrate: coding instructions in various languages to help you connect your code to the simulator.
- Debug: use the Live Log to watch transctions being processed in real-time. Or download the file-based logs.
- Test: This is where you would normally see a list of responses, in the DataVaults case you must trigger the responses as you would in production.
- Reports: real-time test reports showing the frequency and coverage of your DataVault testing.
- Settings: real-world settings you can activate for your testing.
Step 2: Build the XML body
Before we assemble the XML document for our request we should first go over what actions we can use with the DataVaule. Unlike other sims the DataVault has 3 different types of requests you can make against the sim.
Store Card Details
In cases where the user is saving card details but may not be making a purchase (i.e. no Sale, PreAuth or ForceTicket transactions) we can store card details directly into the DataVault. This allows us to store the card details for now and use the token at some point to make a transaction.
This would also be useful when the user is adding extra cards to their account.
In order to store details we need to provide the following params:
- CardNumber (card number)
- ExpMonth (expiry month)
- ExpYear (expiry year)
- HostedDataID, the token name you want to give this card
Note if you provide a
HostedDataIdthat already exists then the details of that card will be updated.
<?xml version="1.0" encoding="UTF-8"?>
<env:Envelope xmlns:xsd="http://www.w3.org/2001/XMLSchema" xmlns:xsi="http://www.w3.org/2001/XMLSchema-instance" xmlns:v1="http://ipg-online.com/ipgapi/schemas/ipgapi" xmlns:env="http://schemas.xmlsoap.org/soap/envelope/">
  <env:Body>
    <ns4:IPGApiActionRequest xmlns:ns4="http://ipg-online.com/ipgapi/schemas/ipgapi" xmlns:ns2="http://ipg-online.com/ipgapi/schemas/a1" xmlns:ns3="http://ipg-online.com/ipgapi/schemas/v1">
      <ns2:Action>
        <ns2:StoreHostedData>
          <ns2:DataStorageItem>
            <ns2:CreditCardData>
              <ns3:CardNumber>42424242424242424242</ns3:CardNumber>
              <ns3:ExpMonth>12</ns3:ExpMonth>
              <ns3:ExpYear>08</ns3:ExpYear>
            </ns2:CreditCardData>
            <ns2:HostedDataID>d763bba7-1cfa-4d3d-94af-9fbe29ec0e26</ns2:HostedDataID>
          </ns2:DataStorageItem>
        </ns2:StoreHostedData>
      </ns2:Action>
    </ns4:IPGApiActionRequest>
  </env:Body>
</env:Envelope>
Display Card Details
Now that we know how to store and update a cards details we can make a request to retrieve them. In order to store details we need to provide the following params:
- HostedDataID, the token name you gave to this cards details
Note the card number will be the first six digits and the last four in the format "XXXXXX...XXXX"
<?xml version="1.0" encoding="UTF-8"?>
<env:Envelope xmlns:xsd="http://www.w3.org/2001/XMLSchema" xmlns:xsi="http://www.w3.org/2001/XMLSchema-instance" xmlns:v1="http://ipg-online.com/ipgapi/schemas/ipgapi" xmlns:env="http://schemas.xmlsoap.org/soap/envelope/">
  <env:Body>
    <ns4:IPGApiActionRequest xmlns:ns4="http://ipg-online.com/ipgapi/schemas/ipgapi" xmlns:ns2="http://ipg-online.com/ipgapi/schemas/a1" xmlns:ns3="http://ipg-online.com/ipgapi/schemas/v1">
      <ns2:Action>
        <ns2:StoreHostedData>
          <ns2:DataStorageItem>
            <ns2:Function>display</ns2:Function>
            <ns2:HostedDataID>d763bba7-1cfa-4d3d-94af-9fbe29ec0e26</ns2:HostedDataID>
          </ns2:DataStorageItem>
        </ns2:StoreHostedData>
      </ns2:Action>
    </ns4:IPGApiActionRequest>
  </env:Body>
</env:Envelope>
Delete Card Details
Deleting a cards details is much the same as asking for the details. In order to store details we need to provide the following params:
- HostedDataID, the token name you gave to this cards details
Note the card number will be the first six digits and the last four in the format "XXXXXX...XXXX"
<?xml version="1.0" encoding="UTF-8"?>
<env:Envelope xmlns:xsd="http://www.w3.org/2001/XMLSchema" xmlns:xsi="http://www.w3.org/2001/XMLSchema-instance" xmlns:v1="http://ipg-online.com/ipgapi/schemas/ipgapi" xmlns:env="http://schemas.xmlsoap.org/soap/envelope/">
  <env:Body>
    <ns4:IPGApiActionRequest xmlns:ns4="http://ipg-online.com/ipgapi/schemas/ipgapi" xmlns:ns2="http://ipg-online.com/ipgapi/schemas/a1" xmlns:ns3="http://ipg-online.com/ipgapi/schemas/v1">
      <ns2:Action>
        <ns2:StoreHostedData>
          <ns2:DataStorageItem>
            <ns2:Function>delete</ns2:Function>
            <ns2:HostedDataID>d763bba7-1cfa-4d3d-94af-9fbe29ec0e26</ns2:HostedDataID>
          </ns2:DataStorageItem>
        </ns2:StoreHostedData>
      </ns2:Action>
    </ns4:IPGApiActionRequest>
  </env:Body>
</env:Envelope>
Combining Requests
Unlike our other Simulators the DataVault allows you to make multiple requests at the same time. To do this we simply add more DataStorageItem elements to the xml document we built. Below is an example request that will do the following:
- Store card details
- Display the card details we just submitted
- Delete the card details we stored
Note you will probably not use Delete in combination with the other actions often but you can use multiples of any action this way as well
Order does matter when making multiple requests in this manner. We will start from the top of the document and process them in descending order
<?xml version="1.0" encoding="UTF-8"?>
<env:Envelope xmlns:xsd="http://www.w3.org/2001/XMLSchema" xmlns:xsi="http://www.w3.org/2001/XMLSchema-instance" xmlns:v1="http://ipg-online.com/ipgapi/schemas/ipgapi" xmlns:env="http://schemas.xmlsoap.org/soap/envelope/">
  <env:Body>
    <ns4:IPGApiActionRequest xmlns:ns4="http://ipg-online.com/ipgapi/schemas/ipgapi" xmlns:ns2="http://ipg-online.com/ipgapi/schemas/a1" xmlns:ns3="http://ipg-online.com/ipgapi/schemas/v1">
      <ns2:Action>
        <ns2:StoreHostedData>
          <ns2:DataStorageItem>
            <ns2:CreditCardData>
              <ns3:CardNumber>42424242424242424242</ns3:CardNumber>
              <ns3:ExpMonth>12</ns3:ExpMonth>
              <ns3:ExpYear>08</ns3:ExpYear>
            </ns2:CreditCardData>
            <ns2:HostedDataID>d763bba7-1cfa-4d3d-94af-9fbe29ec0e26</ns2:HostedDataID>
          </ns2:DataStorageItem>
          <ns2:DataStorageItem>
            <ns2:Function>display</ns2:Function>
            <ns2:HostedDataID>d763bba7-1cfa-4d3d-94af-9fbe29ec0e26</ns2:HostedDataID>
          </ns2:DataStorageItem>
          <ns2:DataStorageItem>
            <ns2:Function>delete</ns2:Function>
            <ns2:HostedDataID>d763bba7-1cfa-4d3d-94af-9fbe29ec0e26</ns2:HostedDataID>
          </ns2:DataStorageItem>
        </ns2:StoreHostedData>
      </ns2:Action>
    </ns4:IPGApiActionRequest>
  </env:Body>
</env:Envelope>
Our Tip: include all xmlns
Make sure you include all xmlns attributes (aka XML namespaces) mentioned in this guide. Without these the XML may not be parsed correctly on the server end.
Step 3: Send the request to the Datavault simulator
Next, your code needs to send the assembled SOAP request to the Sale simulator. The URL to POST to can be found under the "Integration" tab of the simulator - make sure to copy&paste this URL from your simulator as it contains your unique API_KEY.
The example show below shows how to make a Sale transaction using cURL. The "example.xml" contains the constructed SOAP request.
API_KEY is placeholder for your actual API key that you will find on your simulator pages in the Developer Playground.
curl -X POST -d @example.xml \
    https://api.testingpays.com/API_KEY/authipay/v1/ipgapi/services
Step 4: Parse the DataVault response
The simulator will first validate your request. If it detects any issues, you'll see a verbose response indicating what is wrong with the request.
If the simulator detects no issues, then it will simulate a DataVault response. This xml document is quite different from the other responses you have seen so far in it's structure and the elements used.
For completeness we will use the multiple action xml document above for this example as it will show all the responses you will recieve. The important parameter to look for is the <ipgapi:successfully> tag which will contain the result of the transactions as either true or false.
Note that without making the display call only the
<ipgapi:successfully>element would be returned with the total transactions result
<SOAP-ENV:Envelope xmlns:SOAP-ENV="http://schemas.xmlsoap.org/soap/envelope/">
  <SOAP-ENV:Header/>
  <SOAP-ENV:Body>
    <ipgapi:IPGApiActionResponse xmlns:ipgapi="http://ipg-online.com/ipgapi/schemas/ipgapi" xmlns:a1="http://ipg-online.com/ipgapi/schemas/a1" xmlns:v1="http://ipg-online.com/ipgapi/schemas/v1">
      <ipgapi:successfully>true</ipgapi:successfully>
      <ipgapi:DataStorageItem>
        <a1:CreditCardData>
          <v1:CardNumber>424242...4242</v1:CardNumber>
          <v1:ExpMonth>22</v1:ExpMonth>
          <v1:ExpYear>02</v1:ExpYear>
          <v1:Brand>VISA</v1:Brand>
        </a1:CreditCardData>
        <a1:HostedDataID>d763bba7-1cfa-4d3d-94af-9fbe29ec0e26</a1:HostedDataID>
        <a1:cardFunction>credit</a1:cardFunction>
      </ipgapi:DataStorageItem>
    </ipgapi:IPGApiActionResponse>
  </SOAP-ENV:Body>
</SOAP-ENV:Envelope>
Step 5: Handling DataVault Errors
Since this simulator does not provide a set of responses like the other simulators you can still trigger errors by sending in invalid information (as long as the parameters pass validation). For example you can request to display a card that does not exist. In these cases you will see the errors returned to you in the response. The following is an example of such a request.
This is true even if the request has multiple actions within it as each error will be appended to the
<Error>element
<SOAP-ENV:Envelope xmlns:SOAP-ENV="http://schemas.xmlsoap.org/soap/envelope/">
  <SOAP-ENV:Header/>
  <SOAP-ENV:Body>
    <ipgapi:IPGApiActionResponse xmlns:ipgapi="http://ipg-online.com/ipgapi/schemas/ipgapi" xmlns:a1="http://ipg-online.com/ipgapi/schemas/a1" xmlns:v1="http://ipg-online.com/ipgapi/schemas/v1">
      <ipgapi:successfully>true</ipgapi:successfully>
      <a1:Error>
        <a1:ErrorMessage>Hosted data id: d763bba7-1cfa-4d3d-94af-9fbe29ec0e26 not found.</a1:ErrorMessage>
      </a1:Error>
    </ipgapi:IPGApiActionResponse>
  </SOAP-ENV:Body>
</SOAP-ENV:Envelope>
What's Next
You've gone through the guides, it's time to start working against the Simulators for real!